Identify Plant Pests From Photo and Confirm Tiny Insects
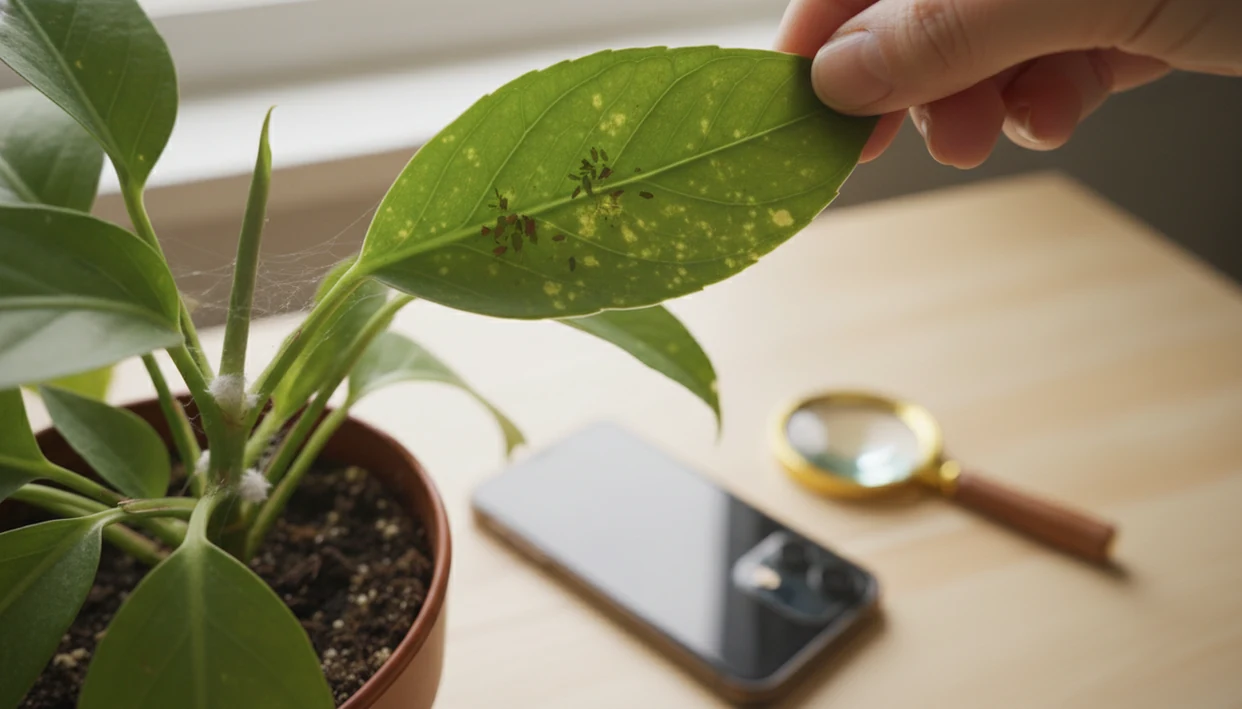
To identify plant pests from photo, take sharp close-ups of the insect, the leaf damage, leaf undersides, stems, soil surface, webbing, sticky residue, and any white cottony material, then confirm the result with a physical inspection. A photo-based plant pest identifier can narrow the likely pest, but small mites, thrips, scale, aphids, mealybugs, and fungus gnats often need more than one image and a few visual clues.
Definition: A plant pest identifier uses photos of insects, residue, webbing, leaf damage, stems, and soil clues to suggest likely pest groups before you confirm them by inspection.
TL;DR
- Photograph both the pest and the damage: speckling, holes, webbing, sticky honeydew, cottony clumps, distorted growth, or soil activity.
- Inspect hidden areas after the photo: leaf undersides, stem joints, new growth, pot rims, and the top layer of damp soil.
- Treat AI pest ID as a guide, not a final verdict, because image-based tools vary in accuracy and some pests need magnification or expert confirmation.
Plant Pest Identifier Basics From a Pest Damage Photo
A plant pest identifier matches visible insects, eggs, residue, webbing, and damage patterns to likely pests. It can suggest spider mites, aphids, scale, mealybugs, thrips, or fungus gnats, but damage alone rarely proves the exact pest.
A yellowing leaf with holes may look dramatic, yet the cause could be insects, disease, watering stress, or an old leaf aging out. We see this often when someone sends one pretty leaf photo and skips the stem, pot rim, and soil surface.
Timely identification matters. The EPA reports that insects and related pests can destroy up to 40% of global crop production annually, which is one reason pest monitoring is treated as a serious management step, not just a houseplant chore source.
Look before spraying.
At-a-Glance Photo Clues for Common Plant Pests
Use this table to compare a pest damage photo with the signs you can see on the plant. The strongest match usually comes from pairing the bug’s location with its residue, feeding marks, and movement.
| Pest | Photo clues to capture | Where to inspect next |
|---|---|---|
| Aphids | Clusters on new growth, sticky honeydew, white shed skins, curled leaves | Tender stems, buds, and fresh leaf tips |
| Spider mites | Fine webbing, stippled leaves, speckling, tiny moving dots | Leaf undersides and dry, crowded foliage |
| Mealybugs | White cottony tufts in joints and along stems | Leaf axils, stem cracks, and protected crevices |
| Scale | Flat or domed bumps attached to stems or leaf veins | Woody stems, midribs, and older leaves |
| Thrips | Silvery streaks, black specks, distorted growth, tiny cigar-shaped insects | New leaves, flowers, and undersides |
| Fungus gnats | Small flies near damp soil, possible larvae in mix | Soil surface, saucers, and wet potting media |
For leaf spotting that looks more like infection than feeding, compare the pattern with a plant leaf spots diagnosis guide before treating for insects.
Five Facts About Identifying Plant Pests From Photos
- Clear, well-lit close-up photos improve pest ID quality because image tools and human reviewers need edges, body shape, and texture.
- Photos should include both the organism and the damage, since a bug on a plant is not always the bug causing the injury.
- Leaf undersides, stems, and soil must be inspected after taking photos because many pests hide outside the first camera frame.
- AI and mobile tools are useful but not 100% accurate, especially with tiny larvae, glare, motion blur, or rare regional pests.
- Correct ID matters because mites, sap-sucking insects, scale, and soil pests often require different responses.
For beginners, multiple focused photos are often better than one wide plant shot because tiny pests disappear against green leaves and potting mix.
How Photo-Based Plant Pest Identification Works
Photo-based plant pest identification works by comparing visible clues in your images with known pest patterns. The system looks for shape, residue, feeding damage, and location, then offers a likely match rather than final proof.
A useful match depends on more than the bug itself. The image may show body outline, legs, webbing, sticky honeydew, cottony material, black specks, leaf stippling, silvery scars, or where the clue sits on the plant. In technical terms, the tool is reading image features, meaning small visual patterns such as edges, textures, and color contrasts. Multiple angles lower false matches because glare, dust, perlite, plant hairs, and dried mineral spots can look like eggs or insects from one view. Pest ID should also stay separate from disease, watering stress, nutrient problems, sun scorch, and old-leaf decline, which can create similar yellowing, spots, or brown margins. Treat the result as a probability-based clue: helpful for narrowing the search, not enough to justify every spray. For mites, thrips larvae, scale crawlers, and other tiny pests, confirm with a hand lens, phone macro, or local extension guidance.
Photo-Based Plant Pest Identification Accuracy and Image Clues
Photo-based pest recognition works by comparing image features against training examples. In plain terms, the system looks for patterns such as insect shape, color, webbing, leaf scars, residue, and where the damage appears.
Multiple angles improve the suggestion because a single image may hide the key clue. A close-up of a fuzzy purple stem might look suspicious until a second photo shows normal plant hairs, not pests. The same caution applies to perlite, dust, and dried mineral residue.
Accuracy varies. A 2018 to 2019 study of plant identifier apps found correct species-level rates ranging from 4% to 88%, depending on the app and plant group source. An iNaturalist computer vision analysis reported about 80% top-1 accuracy for taxa already represented in training data, with lower accuracy for rare or unseen taxa source.
A good photo tool should return likely matches and next-step clues, not a guaranteed diagnosis from one image.
How to Use a Plant Pest Identifier App With Photos
To use a plant pest identifier app well, submit context, close-ups, and follow-up photos instead of one blurry image. Tools like PlantApp can help organize likely matches, but the visible clues still matter more than the first label.
- Start with a whole-plant photo so the tool can see overall decline, growth habit, and where damage appears.
- Capture close-ups of bugs, eggs, webbing, residue, and damaged leaves in bright indirect light.
- Photograph leaf undersides, stems, soil, and new growth separately because pests cluster in protected areas.
- Submit multiple photos instead of relying on a yellow kitchen-light image taken at 10 p.m.
- Compare the app suggestion with visible clues before choosing a treatment.
- Save follow-up photos every few days to check whether pest pressure improves.
Follow-up photos are practical. Tiny changes show up slowly.
Step 1: Take Sharp Pest Damage Photos Before Touching the Plant
“How do I take a useful pest damage photo?” Take the photo before wiping leaves, moving stems, or spraying, because insects scatter and webbing breaks fast.
Use bright indirect light, or place a flashlight to the side so webbing and bumps cast shadows. Hold the phone steady, tap to focus on the insect or damaged area, and wait a second before pressing the shutter. Phone zoom often turns thrips and mites into mushy dots, so move closer when you can.
Take one wider plant photo, then several close-ups of leaves, stems, and the soil line. Include a finger, pencil tip, or ruler for scale when it is safe and clean to do so. A zoomed-out full-plant photo may show decline, but it usually cannot confirm a tiny pest.
For broader symptom sorting, an app that tells if plant is sick can help separate pests from watering, light, and disease clues.
Step 2: Inspect Leaf Undersides, Stems, and Soil for Tiny Pests
A pest photo is only the first pass; the confirmation often happens under the leaf. Turn leaves over and check veins, petioles, and new growth, where aphids, mites, and thrips often sit out of sight.
Check stem joints, crowns, and pot rims for cottony clumps, hard bumps, sticky patches, or small clusters. Then inspect the soil surface for fungus gnats, larvae signs, algae, or activity linked to damp potting mix. If the mix smells soggy, the gnat problem may be partly cultural, not just insect-related.
Use a hand lens or phone macro mode for mites and thrips. No visible bug does not rule out pests, especially when feeding damage appears before the insect is easy to spot.
The pot rim tells stories.
Step 3: Confirm the Pest Name With Visual Clues
Confirm the pest name by matching the app result against pest-specific signs. If the signs conflict, pause before treating and take another photo in natural light.
- Aphids or scale: Sticky honeydew, shed white skins, curled new growth, or sooty residue can point toward sap-sucking insects.
- Spider mites: Fine webbing and pale stippling usually fit mites, especially when damage starts on leaf undersides.
- Mealybugs: White cottony masses in leaf joints, stems, and protected crevices are the key clue.
- Thrips: Silvery scars, black fecal dots, distorted leaves, and tiny slender insects support a thrips match.
- Fungus gnats: Small flying adults from damp potting mix suggest fungus gnats, though larvae may stay hidden.
Diseases, nutrient stress, sun scorch, and low humidity can mimic pest damage. If brown margins are the main issue, it may help to diagnose brown leaf tips before assuming insects.
Step 4: Choose Pest Treatment Only After Photo Confirmation
Choose treatment after confirming the pest group, because mites, sap-sucking insects, scale, and soil pests do not all respond to the same steps. A care step is not a cure unless it matches the cause.
Isolate the affected plant while you confirm the pest, especially on a shelf packed three tiers high. Remove heavily infested leaves only when the plant can spare them and when removal reduces pest pressure. Don’t strip a weak plant just because a few leaves look ugly.
Read product labels carefully, follow local rules, and avoid spraying open flowers or outdoor plants in ways that harm beneficial insects. Cultural fixes also matter: reduce overwatering for fungus gnats, improve airflow around crowded foliage, and clean sticky honeydew so you can see whether it returns.
When the ID remains uncertain, use the app result as a starting point and check against a regional extension source.
Common Plant Pest Photo Mistakes That Cause Wrong IDs
Wrong IDs often start with weak photos. Blurry close-ups, harsh glare, and low light can make eggs look like dust, scale look like bark texture, and thrips look like scratches.
Another common mistake is photographing only yellow leaves or holes without the insect, webbing, residue, or underside. Plant tags faded by sun or tossed with the nursery sleeve also remove context, so the app has less to work with. If the issue is mostly yellowing, use a diagnose yellow leaves process alongside pest inspection.
Skipping new growth is a big miss. Aphids and thrips often prefer tender tissue, while mealybugs hide in joints. Perlite, mineral crust, and lint can also look like pests in a rushed photo.
Do not treat after one AI answer if the signs do not match. Take a second photo. Then decide.
Limitations
Photo-based pest ID is useful, but it has clear limits. University of Nevada Extension notes that image-based mobile apps and online tools can be very useful for plant and pest identification, but they are not 100% accurate, and some pests require microscopic examination source.
- Tiny pests like mites and thrips larvae may be too small for reliable phone photos.
- Fungus gnat larvae and root pests can stay hidden below the soil surface.
- Some look-alikes require magnification, microscopy, or expert confirmation.
- AI tools vary by training data, image quality, region, and species frequency.
- Poor lighting, motion blur, or one-photo submissions can produce wrong IDs.
- Correct ID does not guarantee fast control if watering, crowding, or quarantine problems continue.
- Plant disease, nutrient stress, and environmental damage can resemble pest feeding.
Apps such as Pl@ntNet, PictureThis, and PlantApp can help compare photo clues, but high-risk garden, crop, or pesticide decisions deserve local expert review.
FAQ
Can photos identify plant pests?
Photos can narrow likely plant pests when they show the insect, damage, residue, leaf undersides, stems, and soil. Confirm the result with physical inspection before treating.
What pest is on my plant?
Compare the insect shape, location, sticky residue, webbing, black specks, cottony material, and damage pattern. Those clues usually narrow the likely pest group.
Are plant pest apps accurate?
Plant pest apps are useful guides, but accuracy varies by photo quality, pest size, region, and training data. Some pests need magnification or expert review.
What do spider mites look like?
Spider mites often look like tiny moving dots with fine webbing and stippled leaves. Damage often starts on leaf undersides.
What do aphids look like?
Aphids are soft-bodied insects that cluster on new growth, buds, and tender stems. They may leave sticky honeydew, white shed skins, and curled leaves.
What do mealybugs look like?
Mealybugs look like white cottony tufts in leaf joints, stems, undersides, and protected crevices. They often hide where stems meet leaves.
What do thrips look like?
Thrips are tiny slender insects that can leave silvery streaks, black specks, and distorted leaves. Close inspection or macro photos are often needed.
Why are gnats near soil?
Small flies around damp potting mix are often fungus gnats. Their larvae may live in moist soil, especially when pots stay wet too long.